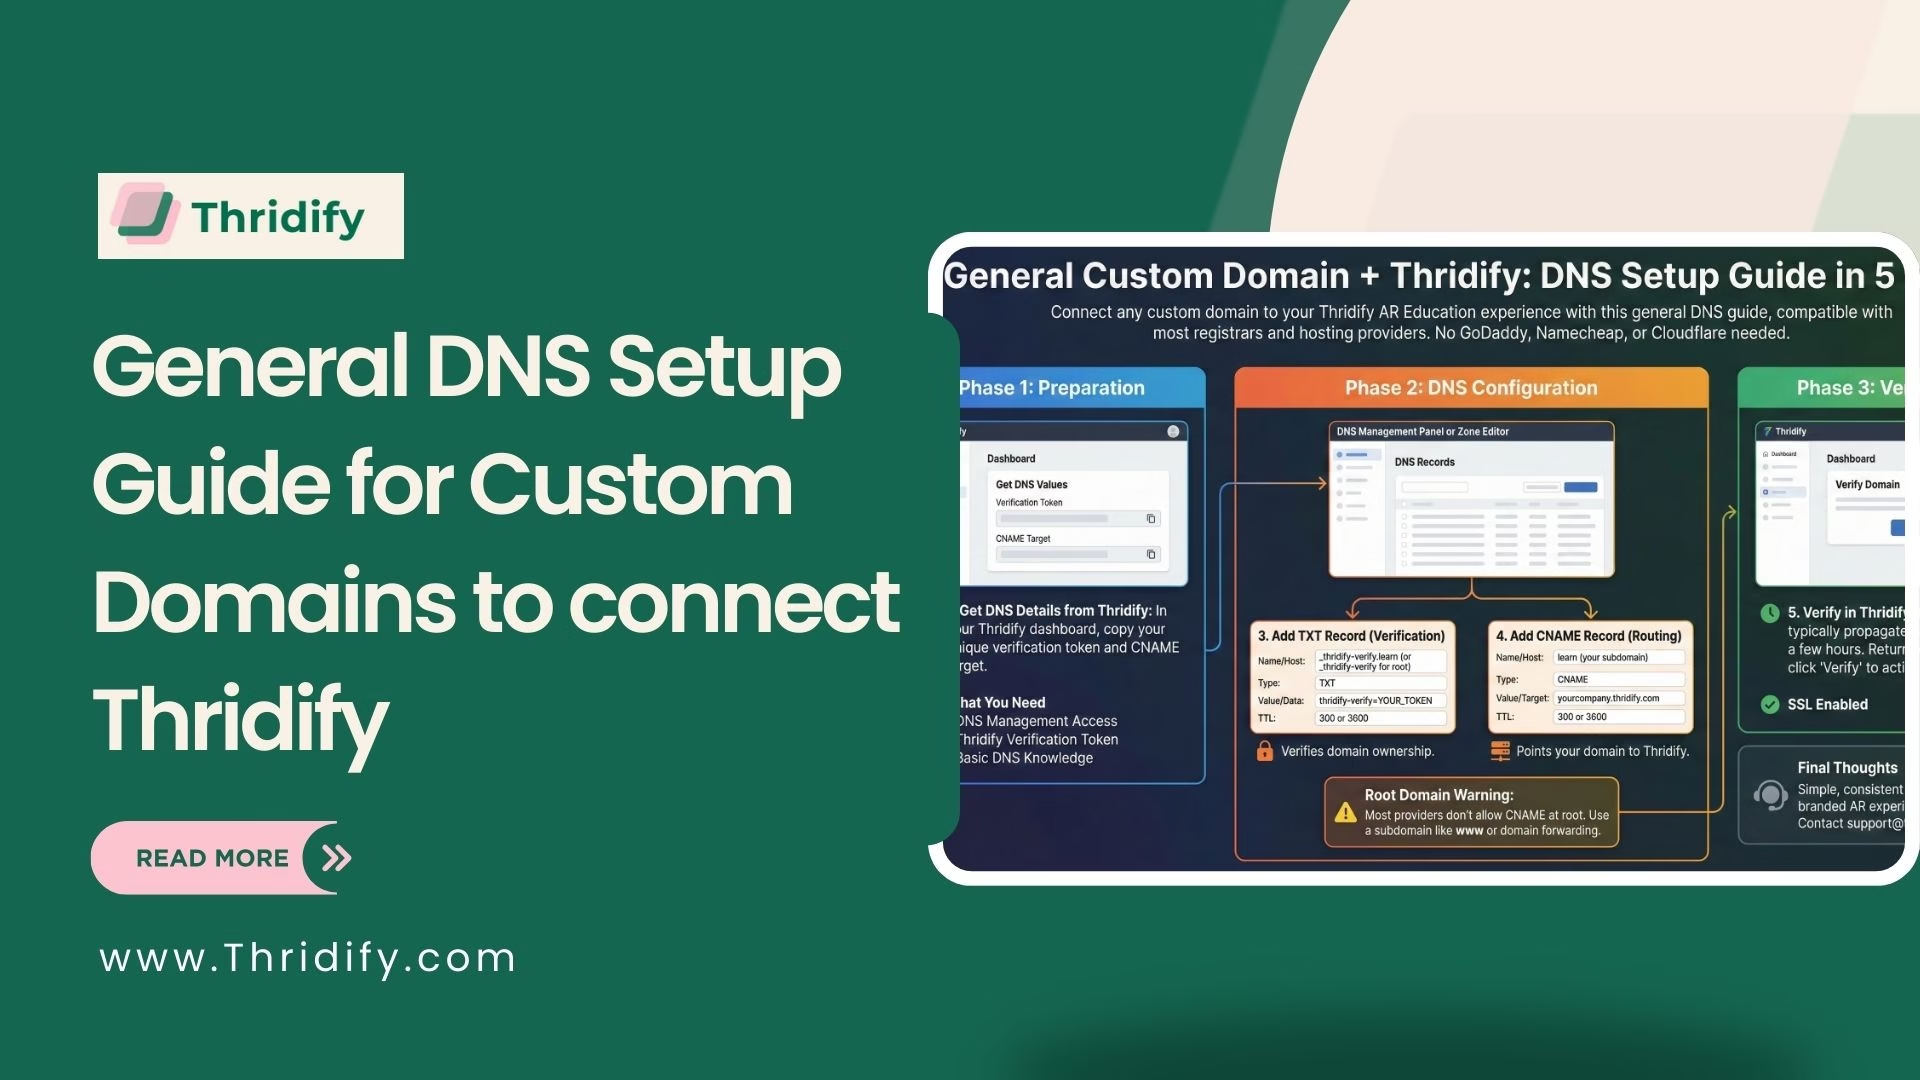
Not using GoDaddy, Namecheap, or Cloudflare? No problem. This general DNS setup guide shows how to connect any custom domain to your Thridify-powered AR Education experience using standard DNS records. The process works across most registrars, hosting providers, and third-party DNS services.
What You Need Before Starting
To set up your custom domain with Thridify, make sure you have:
- Access to your domain’s DNS management panel
- A verification token from Thridify → Domain Settings
- Basic familiarity with DNS records
DNS Records You’ll Use (Quick Overview)
You only need two DNS records:
TXT Record – Domain Verification
This proves you own the domain.
Format:
_thridify-verify.subdomain → thridify-verify=YOUR_TOKEN
CNAME Record – Domain Routing
This points your domain to Thridify’s servers.
Format:
subdomain → yourcompany.thridify.com

Step 1: Get DNS Details from Thridify
- Log in to your Thridify dashboard
- Go to Settings → Domain Settings
- Click Add Custom Domain
- Enter your domain (example: learn.yourcompany.com)
- Copy the verification token and CNAME target
Step 2: Open Your DNS Provider
DNS settings are usually found under:
- DNS Management or Name Servers (domain registrars)
- Zone Editor or DNS Zone (hosting panels like cPanel)
- Dedicated dashboards (Cloudflare, Route 53, etc.)
Step 3: Add the TXT Record
For a subdomain (recommended):
Type: TXT
Name: _thridify-verify.learn
Value: thridify-verify=YOUR_TOKEN
TTL: 300 or 3600
For a root domain:
Type: TXT
Name: _thridify-verify
Value: thridify-verify=YOUR_TOKEN
TTL: 300 or 3600
Step 4: Add the CNAME Record
For a subdomain:
Type: CNAME
Name: learn
Target: yourcompany.thridify.com
TTL: 300 or 3600
⚠️ Most DNS providers don’t allow CNAME records at the root level.
Step 5: Verify in Thridify
DNS changes usually propagate within minutes to a few hours.
- Return to Settings → Domain Settings in Thridify
- Click Verify next to your domain
- Status will move from Pending to Active, with SSL enabled automatically
Root Domain Options (Important)
If you need to use yourcompany.com:
- Use a subdomain like www.yourcompany.com (recommended)
- Redirect root → www using domain forwarding
- Or move DNS to Cloudflare for CNAME flattening
Final Thoughts
No matter which DNS provider you use, connecting a custom domain to Thridify is simple and consistent. With one TXT record and one CNAME record, you can launch secure, branded AR Education experiences—without apps, coding, or infrastructure complexity.
Need help? Reach out to contact@thridify.com and we’ll guide you through it.