Cloudflare is the fastest and most flexible way to connect a custom domain to your Thridify-powered AR Education experience. With quick DNS propagation, built-in SSL, and support for root domains, Cloudflare simplifies custom domain setup while keeping your experience secure and reliable.
Why Use Cloudflare with Thridify?
Cloudflare makes custom domain setup easier by offering:
- Lightning-fast DNS updates (often under 5 minutes)
- CNAME flattening for root domains
- Free SSL certificates
- Built-in security and DDoS protection
- A clean, beginner-friendly DNS interface
Prerequisites
Before you begin, make sure you have:
- A domain already added to Cloudflare
- Access to your Cloudflare dashboard
- A verification token from your Thridify (AR Education) domain settings.
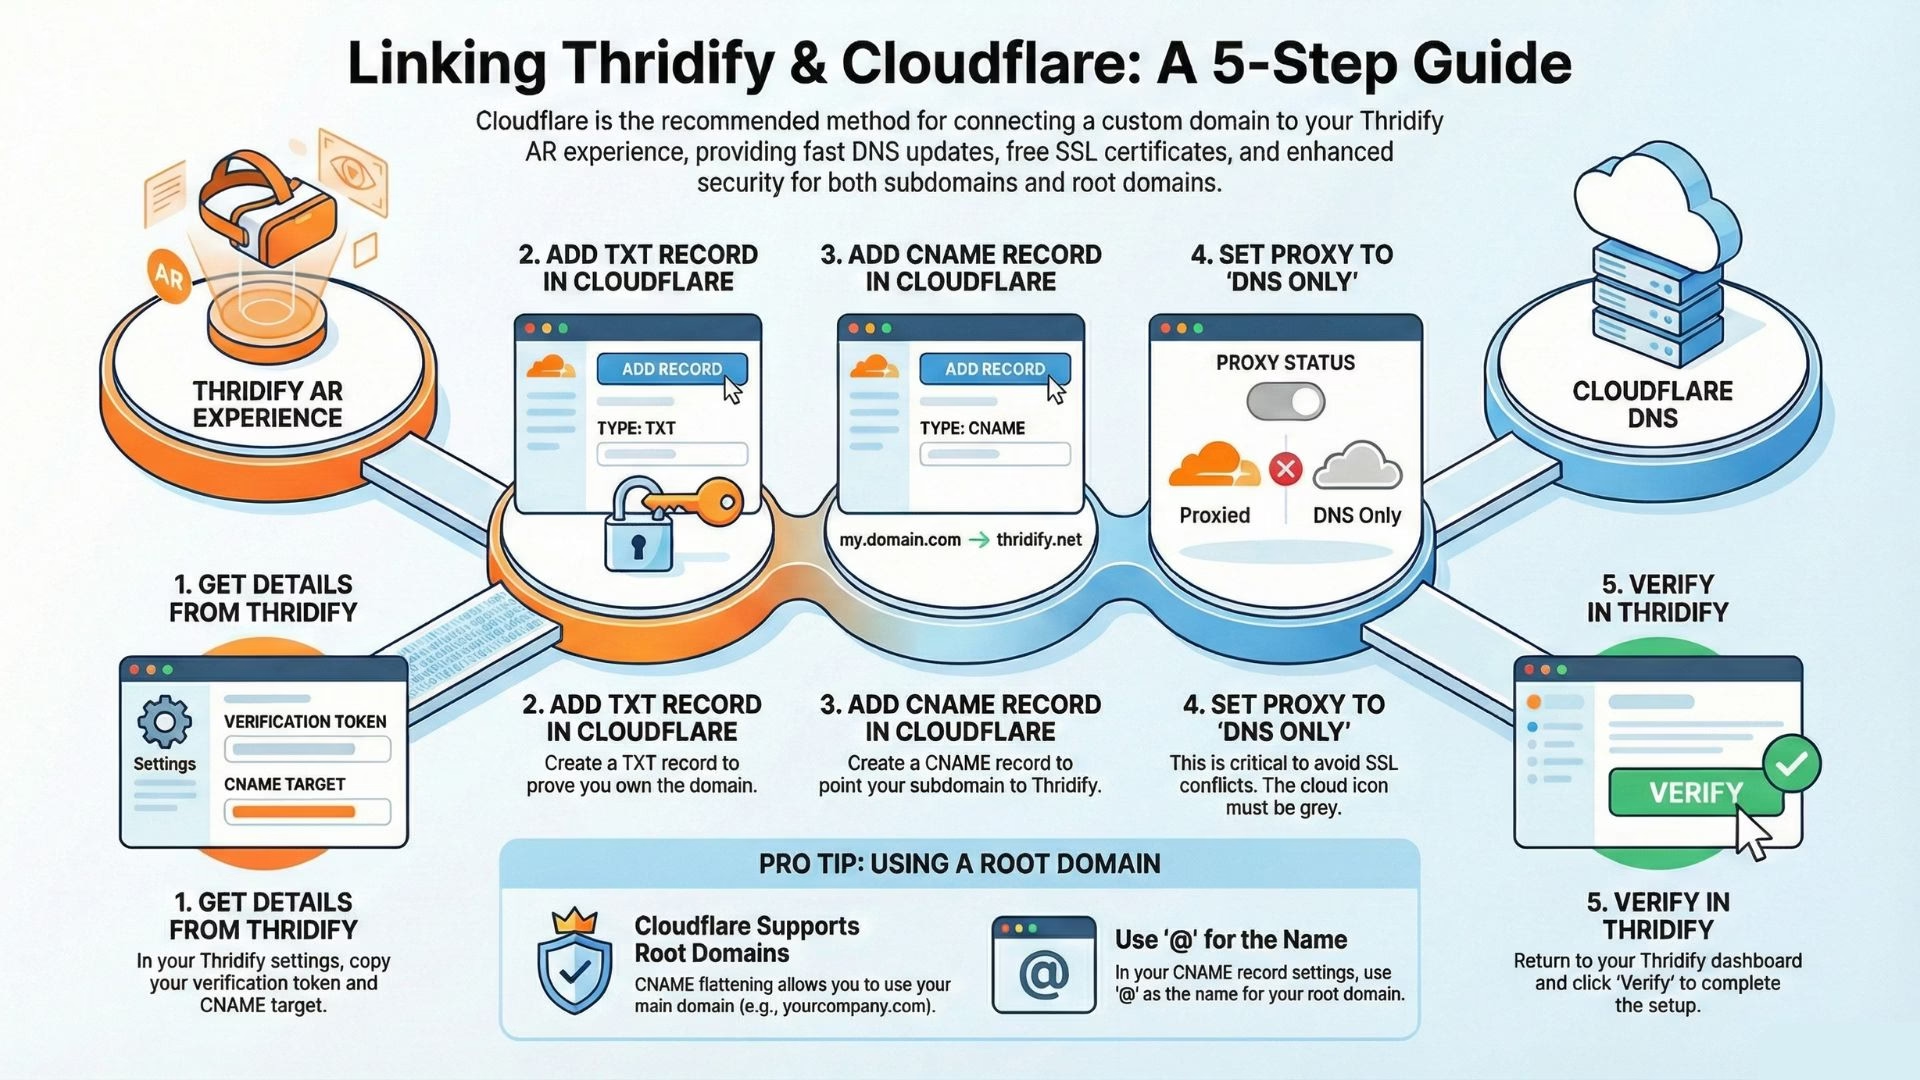
Step 1: Get DNS Details from Thridify
- Log in to your Thridify dashboard
- Go to Settings → Domain Settings
- Click Add Custom Domain
- Enter your domain (example: learn.yourcompany.com)
- Copy the verification token and CNAME target
You’ll use these details in Cloudflare DNS.
Step 2: Open Cloudflare DNS Settings
- Sign in at Cloudflare and select your domain
- Click DNS from the left sidebar
This is where you’ll add your verification and routing records.
Step 3: Add TXT Record for Domain Verification
Add a new DNS record:
- Type: TXT
- Name: _thridify-verify.learn (replace learn with your subdomain)
- Content: thridify-verify=YOUR_TOKEN
- TTL: Auto
This confirms domain ownership with Thridify.
For root domains, use _thridify-verify as the name.
Step 4: Add CNAME Record for Routing
Add another record with the following values:
- Type: CNAME
- Name: Your subdomain (example: learn)
- Target: yourcompany.thridify.com
- Proxy Status: DNS only (gray cloud)
- TTL: Auto
⚠️ Make sure the record is set to DNS only to avoid SSL conflicts.
Step 5: Verify Domain in Thridify
DNS updates on Cloudflare are usually instant. Once added:
- Return to Settings → Domain Settings in Thridify
- Click Verify next to your domain
- SSL will be provisioned automatically after verification
Using a Root Domain with Cloudflare
Cloudflare supports CNAME flattening, allowing you to connect a root domain directly:
- Add TXT record: _thridify-verify → thridify-verify=YOUR_TOKEN
- Add CNAME record:
- Name: @
- Target: yourcompany.thridify.com
- Proxy: DNS only
Cloudflare automatically handles the rest.
Final Thoughts
Cloudflare is the easiest and most reliable way to connect a custom domain with Thridify. With fast DNS propagation, automatic SSL, and root domain support, you can launch branded AR experiences quickly—without apps, coding, or technical complexity.
Need help? Reach out to contact@thridify.com for assistance.