
Connecting a custom domain to your Thridify-powered AR Education experience helps deliver a branded, secure, and professional learning environment. If your domain is registered with Namecheap, this step-by-step guide walks you through the DNS setup required to connect it seamlessly with Thridify—no advanced technical expertise needed.
Why Use a Custom Domain with Thridify?
A custom domain allows you to:
- Maintain brand consistency across AR learning experiences
- Build trust with SSL-secured, browser-based access
- Launch AR content without apps or complex integrations
Prerequisites
Before starting, ensure you have:
- A domain registered with Namecheap
- Access to Namecheap’s Advanced DNS settings
- A verification token from your Thridify (AR Education) dashboard
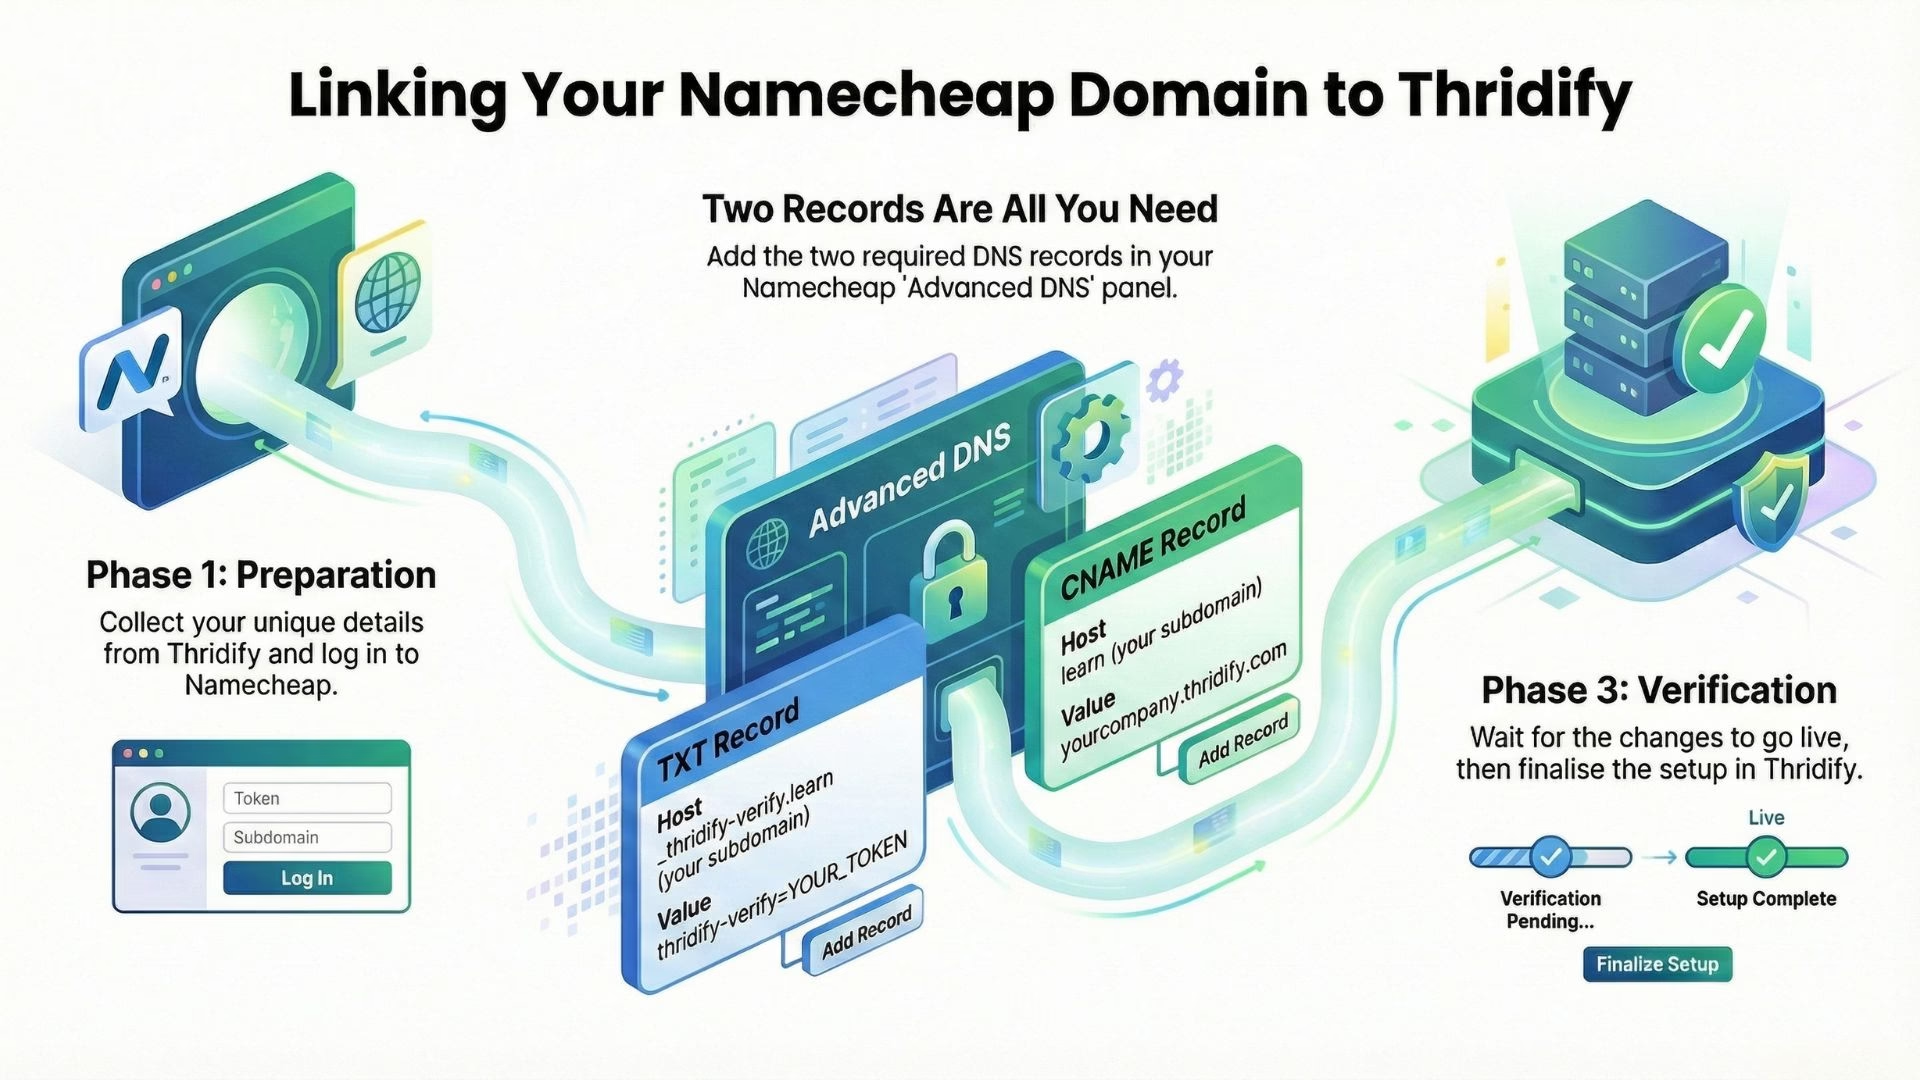
Step 1: Get DNS Details from Thridify
- Log in to your Thridify dashboard
- Navigate to Settings → Domain Settings
- Click Add Custom Domain
- Enter your domain (example: learn.yourcompany.com)
- Copy the verification token and CNAME target
These values will be used in Namecheap DNS.
Step 2: Access Namecheap Advanced DNS
- Sign in to Namecheap
- Go to Domain List → Manage
- Open the Advanced DNS tab
This is where you’ll add your TXT and CNAME records.
Step 3: Add TXT Record for Domain Verification
Add a new record under Host Records:
- Type: TXT Record
- Host: _thridify-verify.learn (replace learn with your subdomain)
- Value: thridify-verify=YOUR_TOKEN
- TTL: Automatic or 5 minutes
This step confirms domain ownership with Thridify.
For root domains, use _thridify-verify as the host.
Step 4: Add CNAME Record for Routing
Add another record:
- Type: CNAME Record
- Host: Your subdomain only (example: learn)
- Value: yourcompany.thridify.com
- TTL: Automatic or 5 minutes
Namecheap automatically appends your main domain, so only enter the subdomain.
Step 5: Wait for DNS Propagation
DNS updates usually propagate within 5–30 minutes but can take up to 48 hours. You can check status using online DNS checker tools.
Step 6: Verify Domain in Thridify
Return to Settings → Domain Settings in Thridify, click Verify, and once approved, SSL will be provisioned automatically.
Final Thoughts
Connecting a Namecheap domain with Thridify ensures a secure, branded, and scalable AR Education experience. With just a TXT and CNAME record, your custom domain is ready to deliver immersive learning—no apps, no coding, and no friction.
Need assistance? Contact on contact@thridify.com for help.